
Introduction
Imagine this scenario: You’ve forgotten your iPhone passcode and desperately attempt multiple combinations, only to be met with the dreaded “iPhone is disabled” message. Frustration sets in as you wonder, “How many attempts does it take to unlock an iPhone?” If you find yourself in this predicament, fear not. This article aims to provide you with practical methods to resolve this issue efficiently and effortlessly. Whether you’re a tech-savvy individual or a novice in iPhone troubleshooting, we’ve got you covered.
How Many Attempts to Unlock iPhone?
To comprehend the frustration behind this issue, it’s crucial to understand the iPhone’s security feature that locks the device after a certain number of failed attempts.
By default, iPhones allow five consecutive failed passcode attempts before imposing a delay. After several failed attempts, you may be prompted to wait for increasing amounts of time or to connect the device to iTunes. This security measure prevents unauthorized access and protects your personal information. After several incorrect passcode entries, your iPhone is temporarily disabled for a specified duration, escalating in severity with each subsequent attempt. Reaching the maximum number 10 attempts can result in a complete lockout, leaving you feeling helpless.
Practical Methods to Unlock Your iPhone
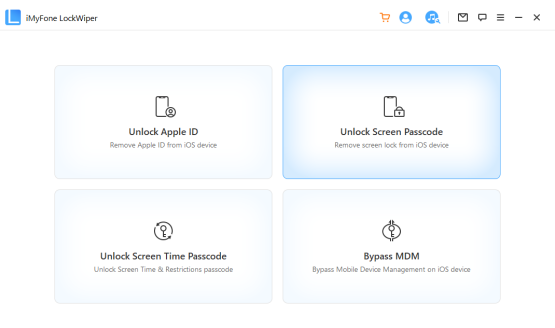
iMyFone LockWiper: The Easiest and Most Effective Solution
When it comes to unlocking your iPhone, iMyFone LockWiper stands out as an exceptional tool that guarantees results. LockWiper is a professional iPhone unlocking software designed to bypass various lock screen scenarios, including the “iPhone is disabled” issue. It’s user-friendly interface and powerful features make it the go-to solution for unlocking iPhones efficiently.
To unlock your iPhone using LockWiper, follow these simple steps:
Step 1: Download and install iMyFone LockWiper on your computer.
Step 2: Launch the program and select “Unlock Screen Passcode” mode.

Step 3: Connect your disabled iPhone to the computer using a USB cable, and select “Trust” this computer.
Step 4: LockWiper will detect your device and provide the necessary firmware package.
Step 5: After confirming the device information, click “Start Unlock” to initiate the unlocking process.
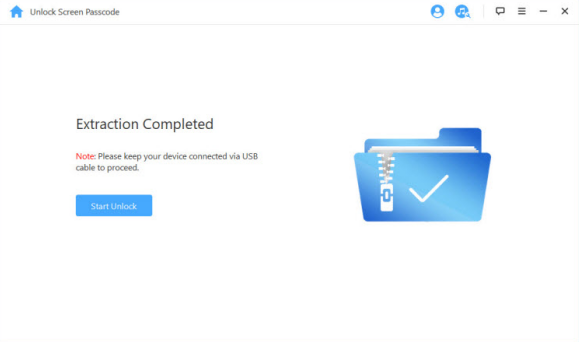

Step 7: Wait for LockWiper to complete the unlock, and voila! Your iPhone is now unlocked.
LockWiper’s effectiveness lies in its ability to bypass the iPhone’s passcode without the need for technical expertise. It ensures a hassle-free experience and enables you to regain access to your device quickly.
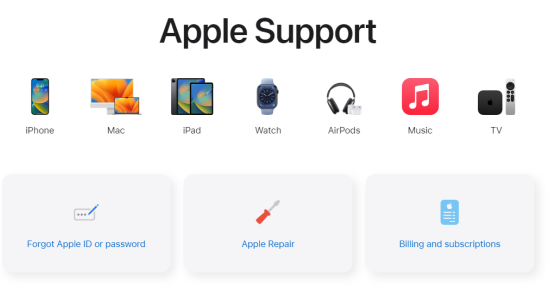
Contact Apple Support: Seeking Assistance from the Experts
If you prefer a more official route, contacting Apple Support is an option worth considering. Apple Support provides assistance for various iPhone-related issues, including unlocking disabled devices. To reach out to Apple Support, follow these steps:
Step 1: Visit Apple’s official support website.
Step 2: Select your location and choose the “Contact Apple Support” option.

Step 3: You’ll be presented with various support options, including phone calls, live chat, or schedule an appointment at an Apple Store.
Step 4: Choose the method that suits you best and follow the instructions provided by Apple Support.
While Apple Support can be an effective solution, it’s important to note that the availability of assistance may vary depending on your location and the specific circumstances of your device.
iTunes Restore: Returning to Factory Settings
Another method to unlock your iPhone involves restoring it to factory settings using iTunes. However, this method comes with a crucial caveat: all data on your device will be erased. To proceed with an iTunes restore, follow these steps:
Step 1: Connect your iPhone to your computer and launch iTunes.
Step 2: Put your device into Recovery mode or DFU mode by following the on-screen instructions.
Step 3: Once your deviceis in Recovery or DFU mode, iTunes will detect it and prompt you to restore or update.
Step 4: Select the “Restore” option to proceed with the restore process.
Step 5: iTunes will download the latest iOS firmware and restore your iPhone to its factory settings.
Step 6: After the restore is complete, you can set up your iPhone as a new device or restore from a previous backup.
It’s essential to remember that restoring your iPhone via iTunes will erase all data and settings, so it’s crucial to have a recent backup to restore your personal information afterward. Additionally, this method may take longer than others and requires a computer with iTunes installed.
Find My iPhone Activation Lock Removal: iCloud Assistance
If your iPhone is locked with an Activation Lock and you have enabled Find My iPhone, you can use this feature to remove the Activation Lock. Follow these steps to unlock your iPhone with Find My iPhone:
Step 1: Visit iCloud.com on a computer or another device and sign in with your Apple ID.
Step 2: Access the “Find iPhone” feature and select your device from the list.
Step 3: Click on “Erase iPhone” to initiate the erase process, which will remove the Activation Lock.
Step 4: Set up your iPhone as a new device or restore from a backup after the erase process is complete.
It’s important to note that using Find My iPhone for Activation Lock removal requires your iPhone to be connected to the internet and associated with your Apple ID. Additionally, this method erases all data on your device, so make sure to have a backup available.
Conclusion
Being locked out of your iPhone due to multiple failed attempts can be a frustrating experience. However, practical solutions are available to help you regain access to your device quickly and effortlessly. Among the methods discussed, iMyFone LockWiper emerges as the easiest and most effective solution, offering a user-friendly interface and powerful features. Whether you choose LockWiper, seek assistance from Apple Support, utilize iTunes restore, utilize Find My iPhone, or explore third-party services, be sure to consider the pros and cons of each method.
Remember, while unlocking your iPhone is essential, security should always be a top priority. Ensure that you follow responsible practices, such as using strong passcodes and regularly backing up your device. By combining practical solutions with a security-conscious mindset, you can overcome the “how many attempts to unlock iPhone” issue and enjoy the full potential of your device once again.
Follow Techdee for more!